GST Tax Table Setup
How to set up tax table in Sage 50
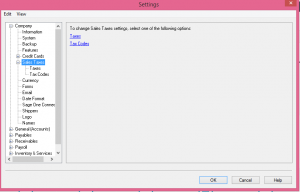
from home screen drop down Setup menu – Settings – Company – Sales Taxes.
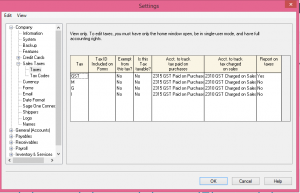
First, lets click on taxes.
 In the Tax colum you can give unique tax names.
Ex: GST, HST, PST depending on the province.
indicate the account number that will be tracking this tax.
For payables account description “GST on Purchases”
and receivables account description ” GST on Sales”
These two accounts should already be setup in the chart of accounts in the liability section.
Ex:
account 2410 Description “GST on Purchases” ( for type choose the subgroup account)
account 2420 Description “GST on Sales” (for type choose the subgroup account again)
Account 2430 Description “Net GST Remit / Refund” (for type choose subgroup total)
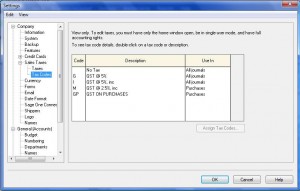
now, lets click on Tax Code
 The code section is designated for your taxable goods.
ex: GS and in the description section type: GST on Sales
GP and in the description section type: GST on Purchases
GV – and in the description section type: GST on Vehicle – if you are a company that uses a percentage of the vehicle for business and rest for personal than you have to take a percentage of GST as well. do not claim the full amount of GST when the vehicle is being used fa portion of time.
GM – and in the description section type: GST on Meals – The meals are expenses at 50% so the GST has been claimed at 50%.
in the USE In Colum – indicate if its for Vendor purchases or sales receivable.
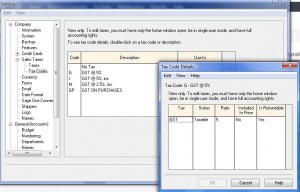
Now lets click on the first code “G”
 In the tax colum you will put GST or PST, the name of the tax.
Status is Taxable
Rate is 5% or other rate depending on the province
Included in price will be “yes” if its for tracking vendor taxes
it will be “No” if its for tracking sales tax
Is refundable will be “Yes” for GST and will be “No” for PST
Hope this helped with setting up tax tables.
Please send me note if you need further explanation.
UPdate Form Numbers & Date
Q. I am no longer using preprinted invoices and have set up Simply Accounting to print invoices. How can I update the form number?
A. It’s easy to update form number. go to setup from main menu – settings – company information – forms. Here you can change payables, receivables and payroll form numbers. If its grayed out and you can’t access it. Switch to single user mode.
Q. we changed our bank account and I have to update to new chq number. Please help.
A. From main menu go to setup – reports and forms – cheques and choose the bank account. At the bottom of the screen under chq settings you can change to new cheque number.
Q. I want to change the date system from just numbers ex: 01/01/2015 to Jan 01, 2015. Can I do that in Simply.
A. You sure can. From main menu, go to setup – settings – company – date format. at the bottom of screen click on Long Date.
