Accounts Payable Tutorial
Accounts payable is a separate department in a business. They are involved in tracking invoices and payments to suppliers. Matching documents such as purchase order, packing slips, freight bills and invoices are important to ensure price quotes and invoices are paid on a timely manner.
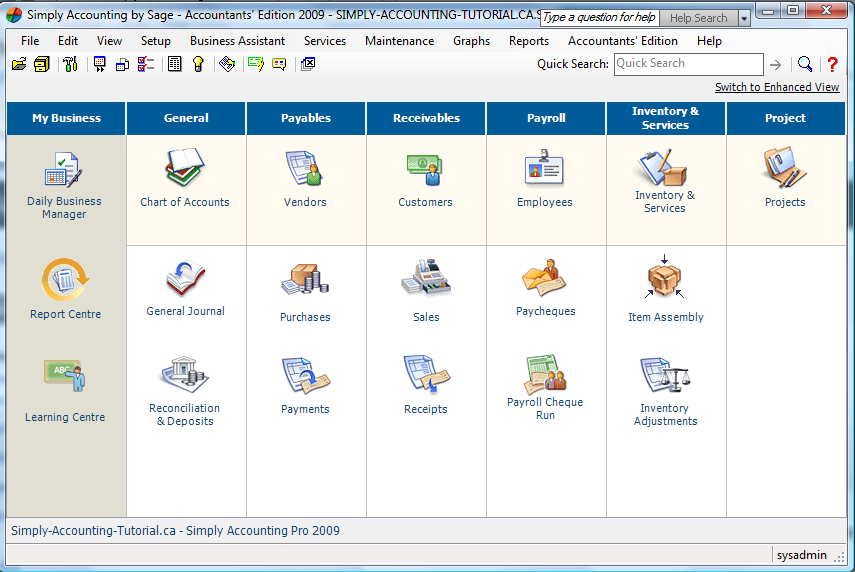
This tutorial will cover accounts payable module by Simply Accounting by Sage software version 2009. The first thing we’re going to look at is the home screen. This way, if you’re following me, we will be on the same page. Your screen should look like this:
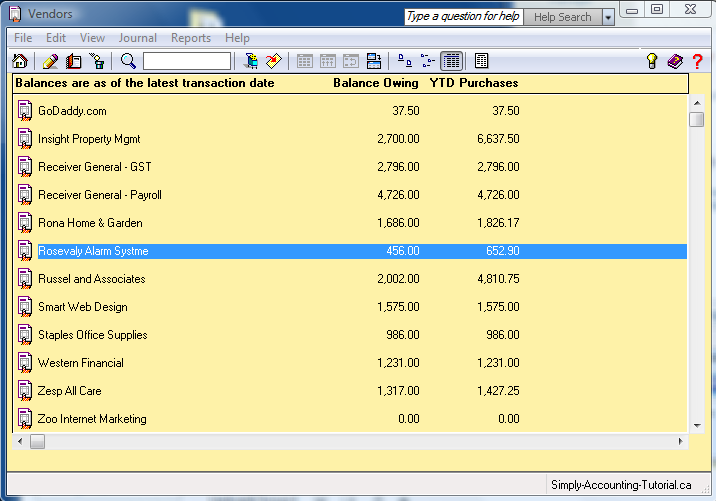
The home screen is divided into sections. The first section is the daily business manager and related topics followed by chart of accounts and the thirst section is the accounts payable that we are going to cover. From the top you have vendors. this is where the vendor or supplier information will be set up, followed by purchases and below that payments. Click on Vendors. A yellow screen should pop up showing each vendor and the balance owning and year to date (YTD) purchases.
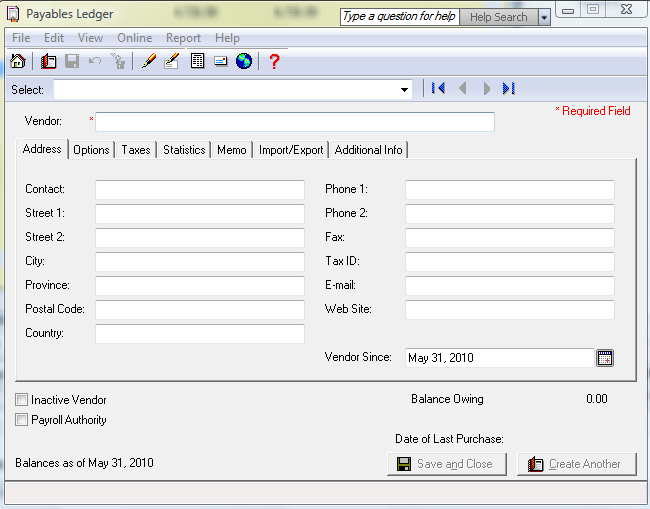
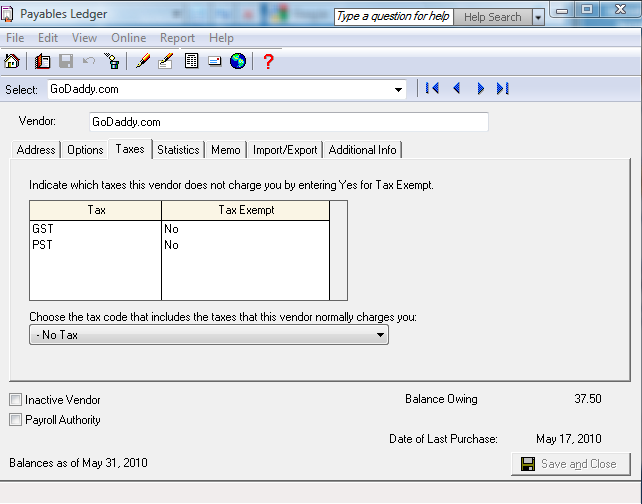
Click on File – Create. The payable ledger will open. Here you can create your supplier’s name, address, phone number tax ID, email and web site. This is the basic information one should have for each supplier.
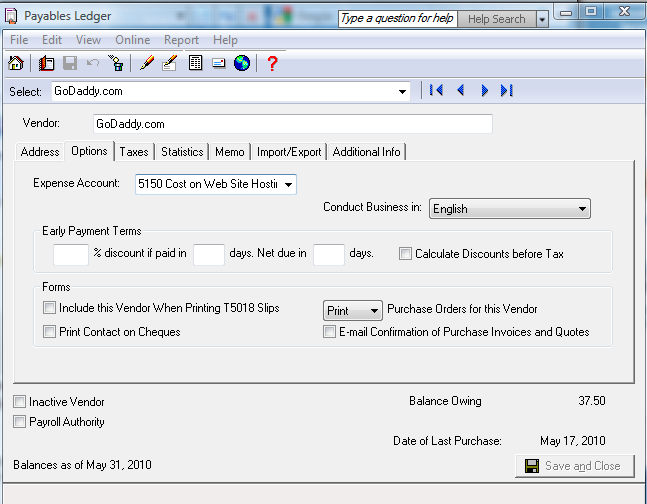
the next tab is options tab. click on options tab and here you can choose an expense account for this vendor. For example GoDaddy.com’s expense account will always be account 5150 Cost on Web Site Hosting. this is a default expense account and can be changed at the time of posting the invoice. the early payment terms option is great so you don’t forget to take advantage. Any business hiring a sub-contractor has to fill out a T5018 form for Revenue Canada. this can be automated by clicking in the box to include the vendor when printing T5018 slips.
Next, click on taxes tab. Here you can choose to set your vendor to charge taxes. In the case of GoDaddy.com being a foreign company it is set as no taxes.
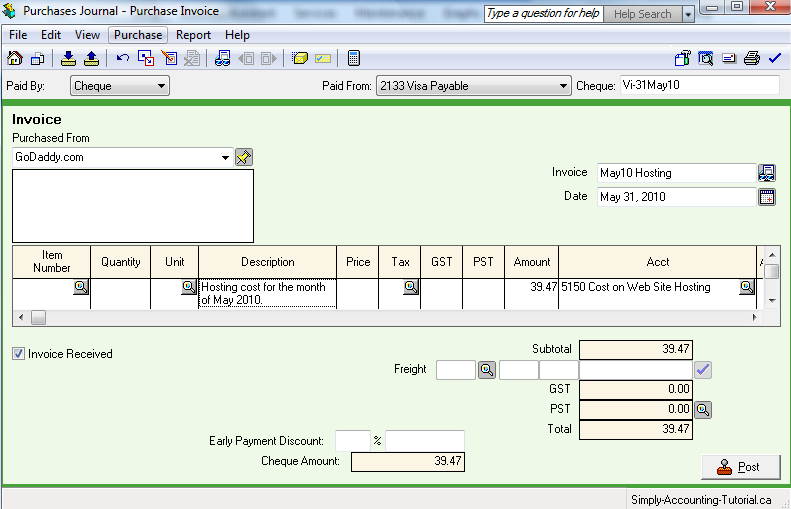
Now lets click on the next module Accounts Payable. From the top drop down the menu across from Paid By: you have three choices Pay Later, Cash or cheque. For those suppliers who have extended a 30 day credit choose Pay Later, those who are cash on delivery (COD) choose Cheque and cash receipts from stores choose Cash. Next section is Purchase From, choose your vendor, I have chosen GoDaddy.com. From Paid By: I have chosen the Cheque option even though I did not pay by cheque but by Visa card. My Paid From is account 2133 Visa Payable and Cheque number I have entered Vi (Visa) and the date that it shows up on my Visa Statement. The invoice number I entered the month that the hosting is for and the date is the date that the charge showed up on my Visa statement. In the body of the invoice I used the description section to put a little blurb as to what the charge is and because this is tax exempt I have no taxes and the amount is in Canadian funds as shown on my Visa statement and the account is the default account set up in the vendor option section.
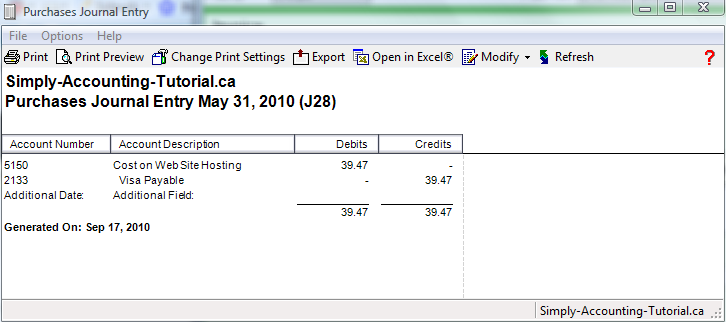
Before you click on Post you can verify that your entry is affecting the right accounts, click on Reports – Purchase Journal Entry. The screen will show account 5150 being debited and recording the expenses and account 2133 being credited recording the liability to the Visa company. The journal entry number is shown in brackets. This one is (28), you can record the number for future reference.
Payment Journal
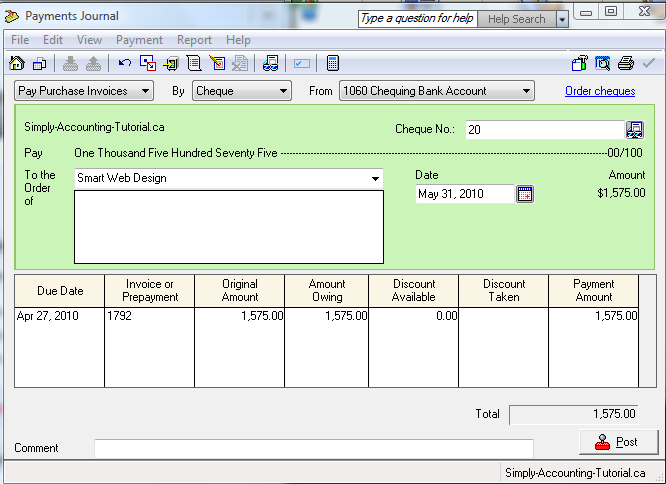
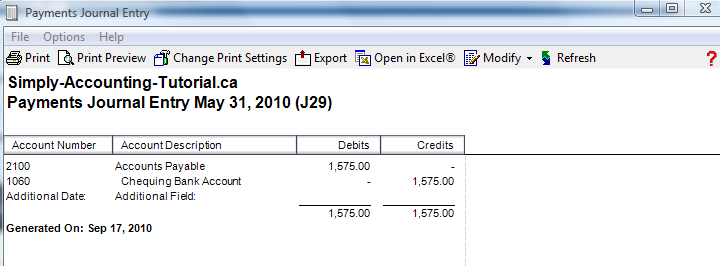
Now we have posted all the payable that are already paid and those that have 30 day credit. Let’s go to the payment journal and prepare a cheque for Smart Web Design. In the home screen click on Payments. From the top you will see a box indicating “Pay Purchase Invoice” by “cheque” which is the method of payment from: “1060 Chequing Bank Account”. In the “To the order of box” choose your vendor, in this case I will choose Smart Web Design. My cheque number is 20, my date is May 31, 2010 and the amount I will be paying is $1,575. shown in “Payment Amount”. The total is also $1,575.. What you’re doing here is crediting the bank for $1,575. and debiting accounts payable for the same amount.
Let’s look at the journal entry and see the effect the general ledger will have once this entry is posted. Click on Reports – payment Journal Entry Report.
I hope this session has been helpful. You can check out the payroll tutorial at http://www.simply-accounting-tutorial.ca/category/small-business-payroll-software and do your own payroll in-house, save money and time.
